User Guide Email Dialogue Provider
Introduction
The Email Dialogue Provider uses the Anywhere365 WebAgent for its interface. This manual will focus on the actions that can be done for Email Text Handling. Learn More about the other feature of the WebAgent.
Signing in to WebAgent
To use the WebAgent to handle communications, an Agent must sign in with valid credentials.
To sign in to WebAgent
-
Open a web browser page to the following URL:
Note: Based on your region, a different URL needs to be used. This information will be shared by your Anywhere365 representative.
Global:
https://webagent.anywhere365.io
NORA
https://nora-cus-webagent.anywhere365.io
https://nora-cus-2-webagent.anywhere365.io
https://nora-cus-3-webagent.anywhere365.io
EMEA
https://emea-weu-webagent.anywhere365.io
https://emea-weu-2-webagent.anywhere365.io
https://emea-weu-3-webagent.anywhere365.io
APAC
https://apac-eas-webagent.anywhere365.io
-
The WebAgent sign in page will appear:
-
Sign in using your Anywhere365-enabled account (Sign-in address + Password).
Note: If you are using an Office365 authentication method, make sure your browser is not set to block pop-ups. -
After logging in, you will be ready to start using the Anywhere365 WebAgent.

Login UCC
-
Click in the top right to open the MePerson (your account)

-
Select Manage Profile

-
Toggle the state to Sign In

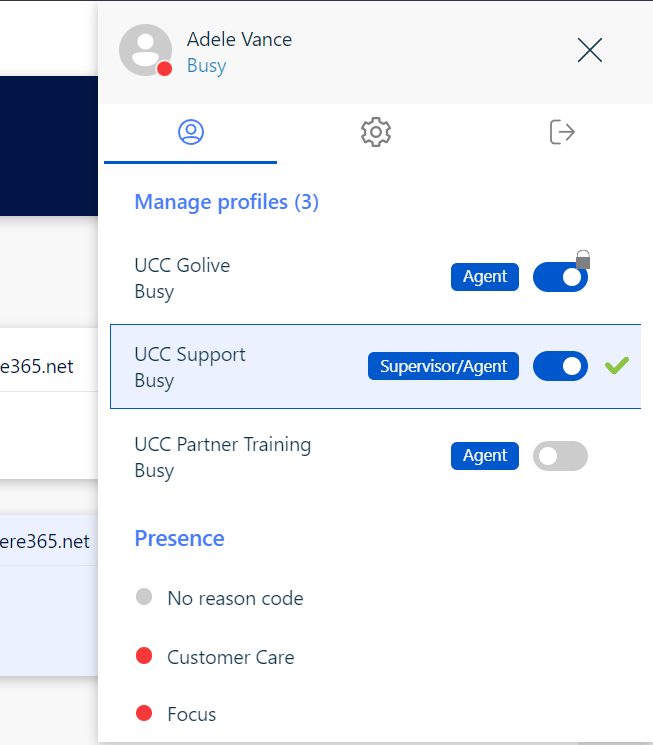
| Icon | Action | Description |
|---|---|---|

|
Sign Out | User is currently active, click to sign out. |

|
Sign In | User is currently inactive, click to sign in. |

|
Informal | User is Informal and doesn't have the option to sign in or out. |
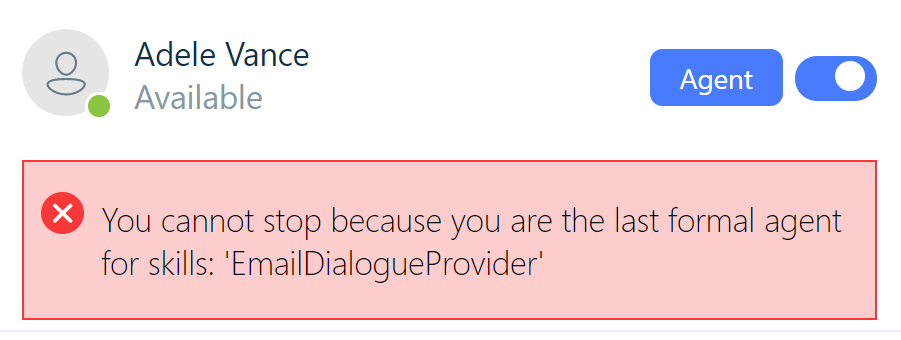
If you are the last agent in a skill, you may get a feedback based on the UCC setting "FeedbackAgentsLeftInSkill", Learn More
Confirmation
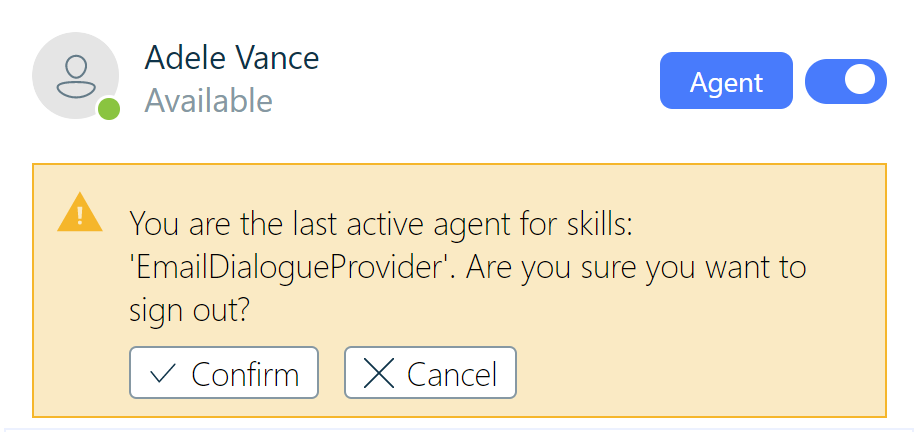
Warning

Error
Incoming Text
When the user is ready for a new text and an text is queued, the user will automatically be offered the text.

Text buttons:
During an incoming text there a two buttons available. The following describes what functionality they have.
|
Icon |
Action |
Description |
|---|---|---|
|
|
Disconnect |
With the Disconnect button you can reject an incoming dialogue. |
|
|
Accept |
With the Accept button you can accept an incoming dialogue. |


Email Session
After clicking the accept button, the text is assigned to the agent. New controls will appear.

Email session buttons:
During an text session you have access to control buttons. The following describes what functionality they have.
|
Icon |
Action |
Description |
|---|---|---|
|
|
Reply |
With Reply, you can sent a reply to the customer. |
|
|
Forward |
With Forward, you can sent a message to an other email address. |
|
|
Transfer |
With Transfer, you can transfer to another skill. |
|
|
Handle |
Mark the text as handled. Closing the session. |
|
|
Tread |
Show the complete tread of the text. Including previous messages in previous sessions. |


Reply
After accepting the text dialogue, the client will pop open the response window. In here you can type your answer and press send.

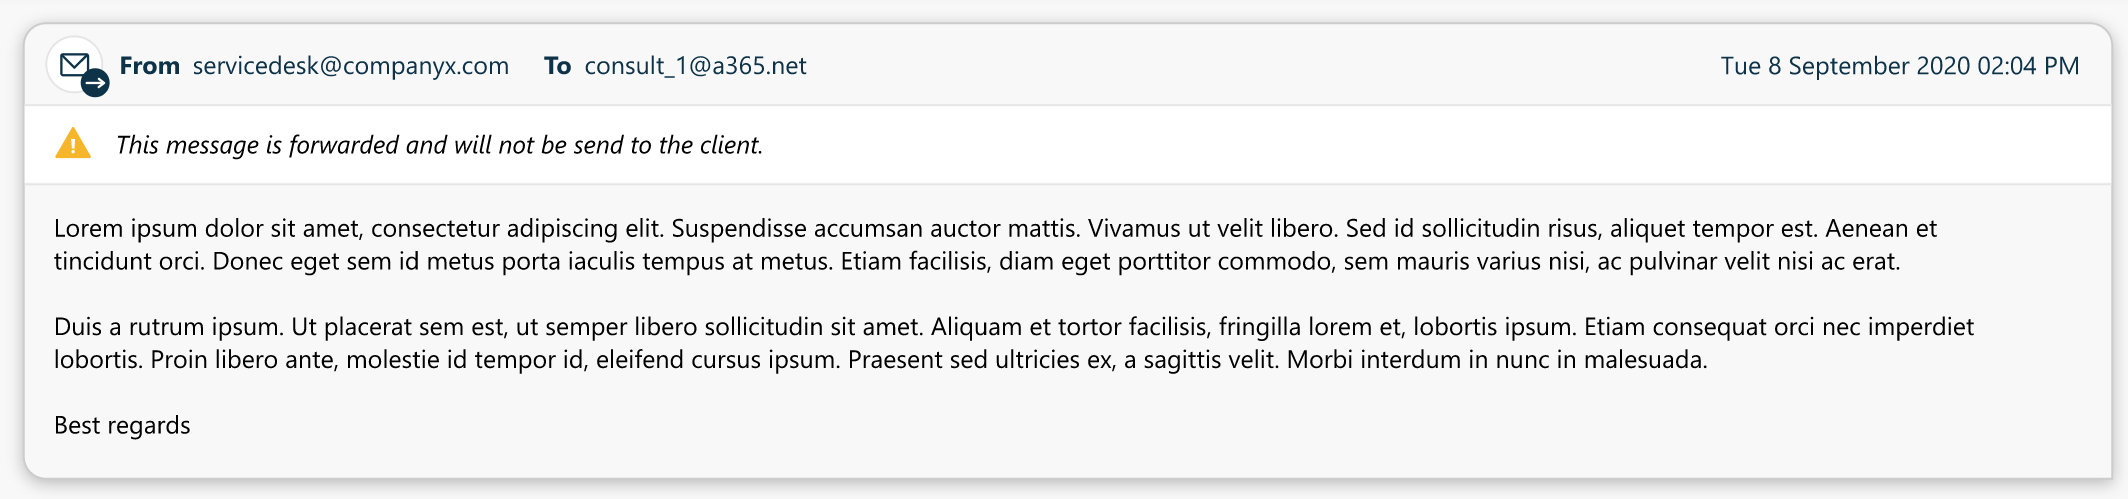
Forward
If you want to forward information to a external party, you can use the Forward button. This will open a new window where you can enter the email address of the external party and the message you want to send.
Message to external party
Message from external party

Predefined responses
Besides typing your response.
You can also select a predefined response by clicking on the  icon. The responses are configured in the SharePoint list.

Transfer
To transfer the session to another skill. You first need to receive or handle an text. During the session click on the ![]() icon and search for a skill.
icon and search for a skill.
The text will now be put in the queue of the other skill.
New Outbound Email
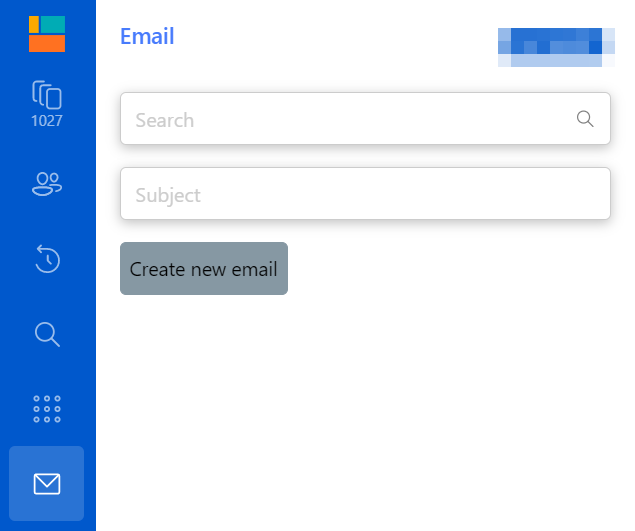
The Anywhere365 WebAgent can be used to initiate an outbound email through Anywhere365, while keeping all dialogues centralized in a single platform. To start a new outgoing email dialogue, use the button at the bottom of the WebAgent border menu.

You are now presented with a prompt, where you need to provide the primary contact and the subject of the email.
Contacts can be searched, or an email address can be entered manually. Click the email button behind the name to select the name.
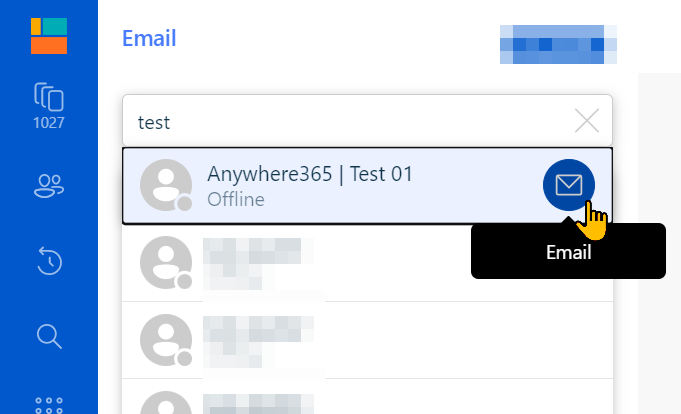
Once both fields are filled in, the ‘Create new email’ button becomes available. Click it.

A new email dialogue is started, with the contact from the previous step in the ‘to’ field. For additional recipients, the cc area can be used. The primary contact will be used for reporting functionality like Business Intelligence reports and the Timeline.

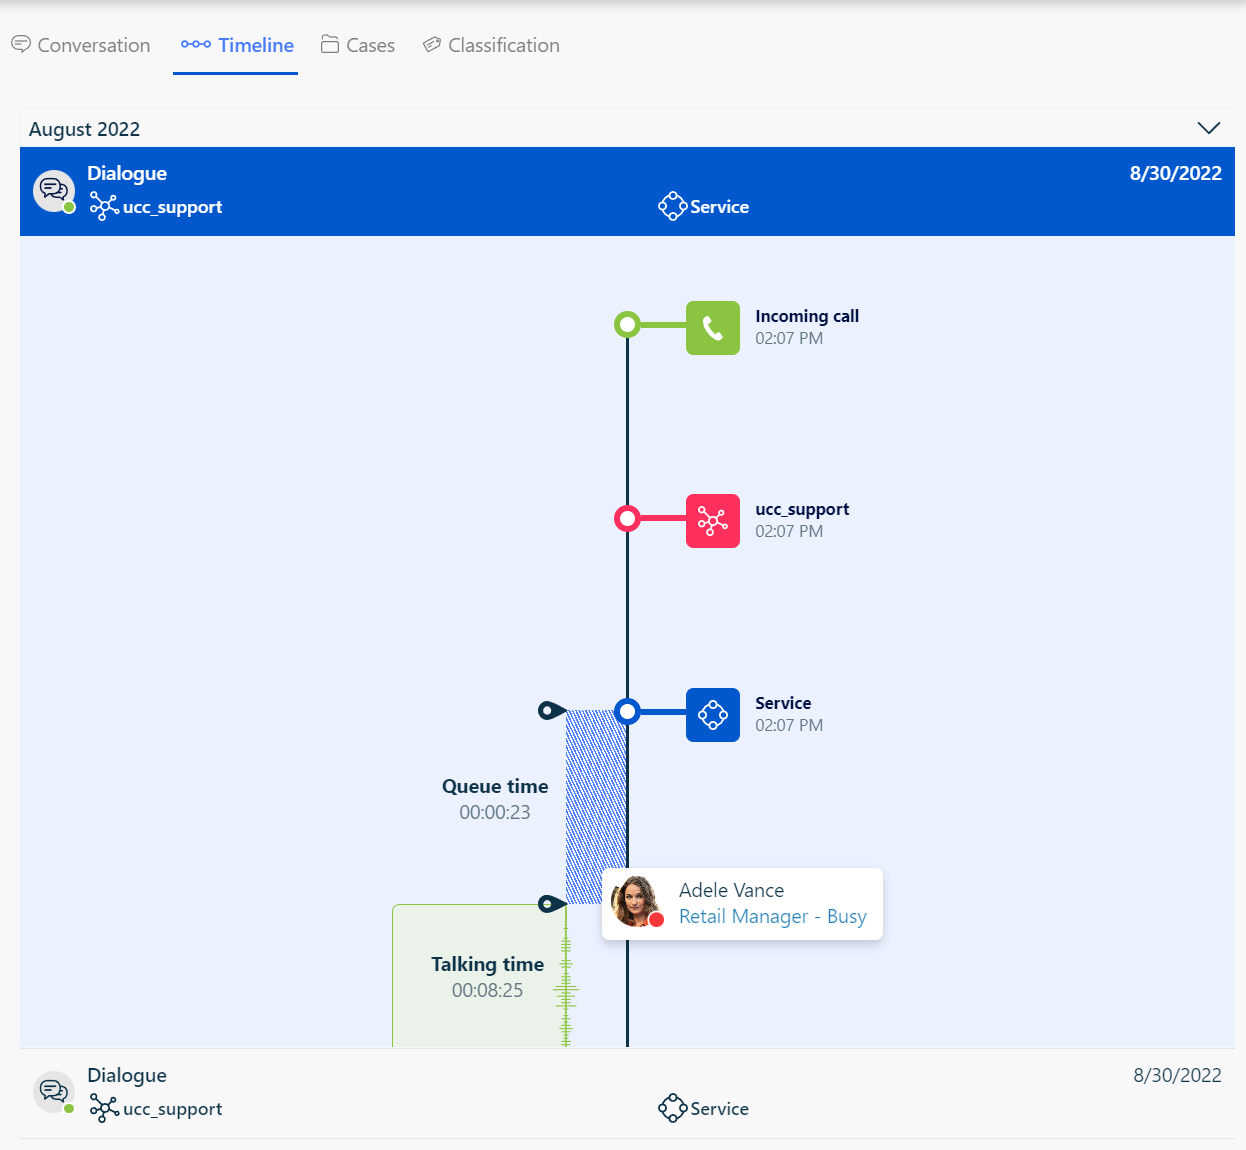
Timeline
The timeline feature allows you to view information about previous interactions with the customer. To access the timeline, click on the icon. This will load all the contact moments associated with the customer's information.
In the top bar of the timeline, you can scroll through the various dialogues and interactions. By clicking on a specific dialogue or interaction, you can view more details about that contact moment. These details include information about the skills used, the agent who handled the contact, and whether the dialogue was transferred or not.
The timeline feature provides a comprehensive overview of the customer's interactions with your organization. This information can be used to identify patterns, track customer behavior, and improve overall customer service.
Please note that the timeline feature only displays information about previous interactions with the customer, not the current one. If you require assistance with the current contact, please refer to the relevant sections of the platform or consult with your supervisor or team leader for guidance.
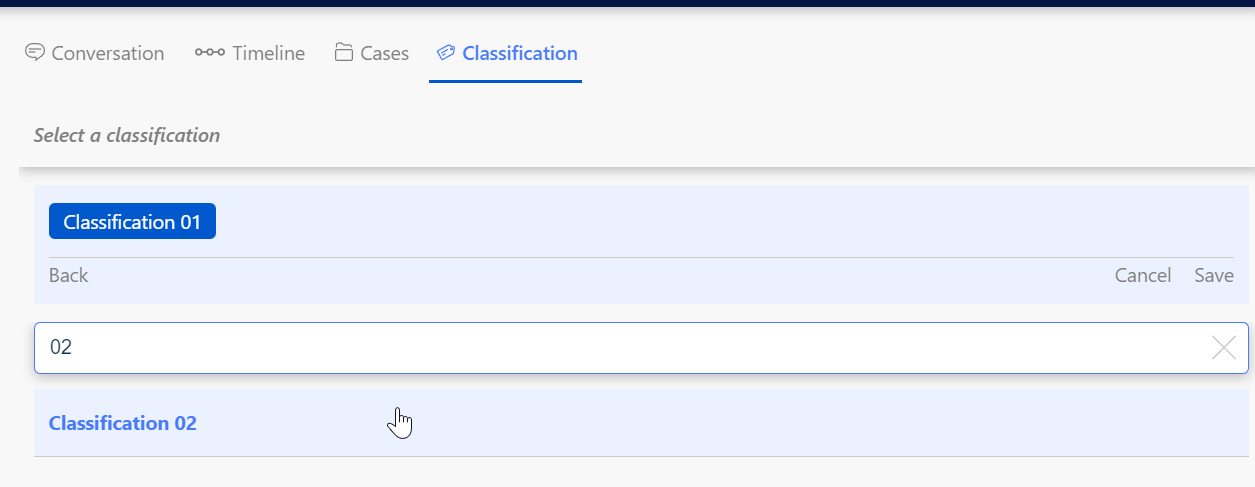
Classification
To access the Classification tab, click on the Classification tab during an active call, it will also be automatically opened as a pop-up when Finishing a conversation. Here, you can select a predefined classification from the drop-down menu. Once you've selected the appropriate classification, click on the "Submit" button to send the data to the database. This will allow you to generate Dialogue Intelligence reports based on the selected classification.
Search Text
When a user want's to lookup an text conversation, they can use the "Search Text" feature. This can be done by clicking on the  icon in the side bar.
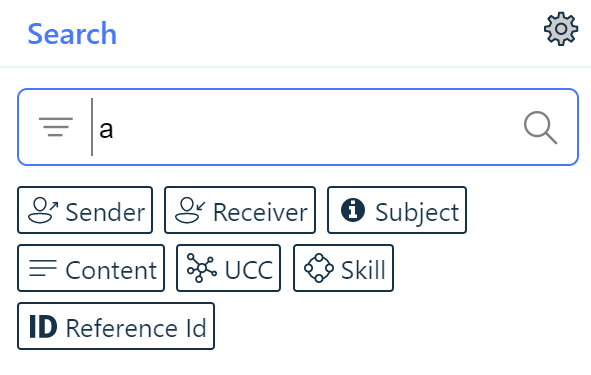
Search Items
To start searching, you can enter your search criteria in the search bar. Optionally you can select a specific attribute to search on. Alternatively if you press enter, it will search all attributes.
|
Attribute |
Description |
|---|---|
|
Sender |
Search on the Sender field of a Text. The URI who started the conversation. |
|
Receiver |
Search on the Receiver field of a Text. The URI who the conversation was sent to. |
|
Subject |
Search in the Subject (header) field of a Text. |
|
Content |
Search in the Content (body) field of a Text. |
|
UCC |
Search on the name of the UCC connected to a Text. |
|
Skill |
Search on the name of the Skill connected to a Text. |
|
Reference ID |
Search on the Reference ID of a Text. Reference ID is an unique ID created per Text conversation. |
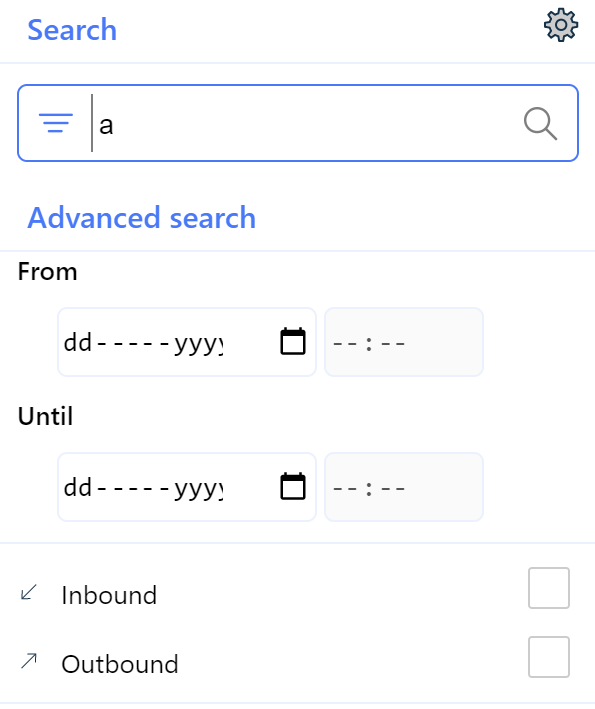
Search Filters / Advanced Search
If you want to use an even more detailed search, you can open the filter by clicking in the  icon. This will open the filter options.
|
Filter |
Description |
|---|---|
|
From |
Only show conversations after the entered date time. |
|
Until |
Only show conversation before the entered date time. |
|
Inbound |
Only show inbound conversations. Customer send to the Dialogue Manager. |
|
Outbound |
Only show outbound conversations. Agent replies to the Customer. |
|
By UCC |
Only show conversations on the selected UCCs. |
|
By Skill |
Only show conversations on the selected Skills. |
Search results
After entering your search criteria, you will get your search results. Based on the state of the conversation you can will get a different reaction on the "show" action by clicking on the  icon.
icon.
Waiting
|
Icon |
Action |
Description |
|---|---|---|
|
|
Take |
Take the session from the waiting queue. The conversation will now be offered to the Agent. |
|
|
Preview |
Show the conversation as a preview. From here you can see the content of the conversation and you will have the option to "Take" the session. |
Archived
|
Icon |
Action |
Description |
|---|---|---|
|
|
Show |
Open the archived session. |
Search Settings
From the Search Settings, you have the option to switch the view. The settings can be opened by clicking on the ![]() icon. Here you can switch between "Compact" and "Extended" view.
icon. Here you can switch between "Compact" and "Extended" view.
-
Compact = A compact view of the results, with the following attributes:
-
Type = The type of the conversation.
-
Sender = The URI of the sender.
-
Skill= The Skill where the conversation is connect to.
-
State = Show the current state of the conversation
- Waiting = The conversation is waiting in the queue.
- Connected = The conversation is connected to an agent.
- Archived = The conversation is completed and archived.
-
Duration = Show the duration of the conversation. Time between condensation created and now.
-
-
Extended = Compact view extended with the following attributes:
-
Subject = The subject (header) field of the conversation.
-
Reference ID = Reference ID is an unique ID created per Text conversation.
-
Received date and time = The datetime the conversation was received.
-
Settings
Accessing Settings:
To configure your WebAgent settings, click on the MePerson menu located on the top right corner of your screen. From there, select "Settings" to access the various options available.
General Settings:
Under the General settings, you can customize the following options:
-
Change theme: You can set the color theme of the WebAgent. Choose between Dark theme, Light theme, and Teams theme.
-
Notification time: You can select how long a notification should be displayed. Choose between 5 Seconds, 10 Seconds, 30 Seconds, or No Timer.
-
First open dialogue tab: You can configure which tab should be open by default for a new conversation. Choose between Cases, Classification, Contact information, Conversation, and Timeline. If the selected Tab isn't available, it will fallback to Conversation.
-
Enable shortcuts: You can toggle if shortcuts should be enabled. By default, they are enabled.
Audio Settings:
Under the Audio settings, you can customize the following options:
-
Incoming text conversation: When enabled, an audio file will play when a text conversation is offered to the Agent. Choose between None, Ringtone 1, and Ringtone 2. This way, an agent can hear a text session being offered even when the WebAgent isn't on the screen.
-
Incoming text message: When enabled, an audio file will play when a new text message is added to the text conversation. Choose between None, Alert 1, and Alert 2. This way, an agent can hear a new text message has been received even when the WebAgent isn't on the screen.
Uncaught (in promise) DOMException: play() failed because the user didn't interact with the document first.