Installation of Attendant Console for Dialogue Cloud
The Attendant Console for Dialogue Cloud needs to be correctly configured before first use.
The prerequisites for using the Attendant Console for Dialogue Cloud summarized are:
Summary
- A valid (trial) license for the Attendant Console for Dialogue Cloud.
- See: Obtaining a (trial) license (below)
- A configured and operational Dialogue Cloud environment, including the WebAgent.
- Adequate user permission for the Anywhere365 Attendant Console for Dialogue Cloud application to access the customer tenant's Microsoft resources.
Detailed instructions for performing these steps are found below.
Detailed instructions
Obtaining a (trial) license
If you do not already have a license for Attendant Console for Dialogue Cloud, you can request a trial license for one or more persons by contacting Anywhere365 or the Partner assisting you with your deployment.
Once a valid license has been obtained for one or more users they can access the Attendant Console on URL:
If the following screen appears (after signing in), you either do not yet have a valid license, or there is a registration/administration issue.

If your license is valid, the Attendant Console for Dialogue Cloud will open (see below).
Confirming Your Dialogue Cloud (including Web Agent) is Operational
Because the Attendant Console for Dialogue Cloud shares its configuration with the Web Agent, a functioning WebAgent is required. If you have a functioning WebAgent, the Attendant Console for Dialogue Cloud should also work for the same user.
Obtaining Consent for the Attendant Console for Dialogue Cloud Application
If the Anywhere365 Attendant Console for Dialogue Cloud application does not have sufficient rights to access the customer tenant, a Microsoft notification will be displayed.

To request approval to use this application, enter a justification and click on Request approval. An email will then be sent to the customer’s Microsoft administrator who will grant the required permissions..
Administrators of the Microsoft tenant who do have sufficient permissions will have the option to consent on behalf of the organization:

Consent can also be granted by sharing this URL with an administrator:
https://login.microsoftonline.com/common/adminconsent?client_id=b49e1919-ca4f-4a60-bae4-24bb7b231f97
The administrator will see a screen like this and can consent for the organization:

Opening the Attendant Console for Dialogue Cloud
Once all prerequisites have been fulfilled, you will be able to use the Attendant Console for Dialogue Cloud.
To run it, using a standard web browser, navigate to:
A standard Microsoft sign in screen will appear. Sign in using the same Microsoft credentials used for the WebAgent. The Attendant platform will -on the fly- create a customer tenant and user profile during the first login.
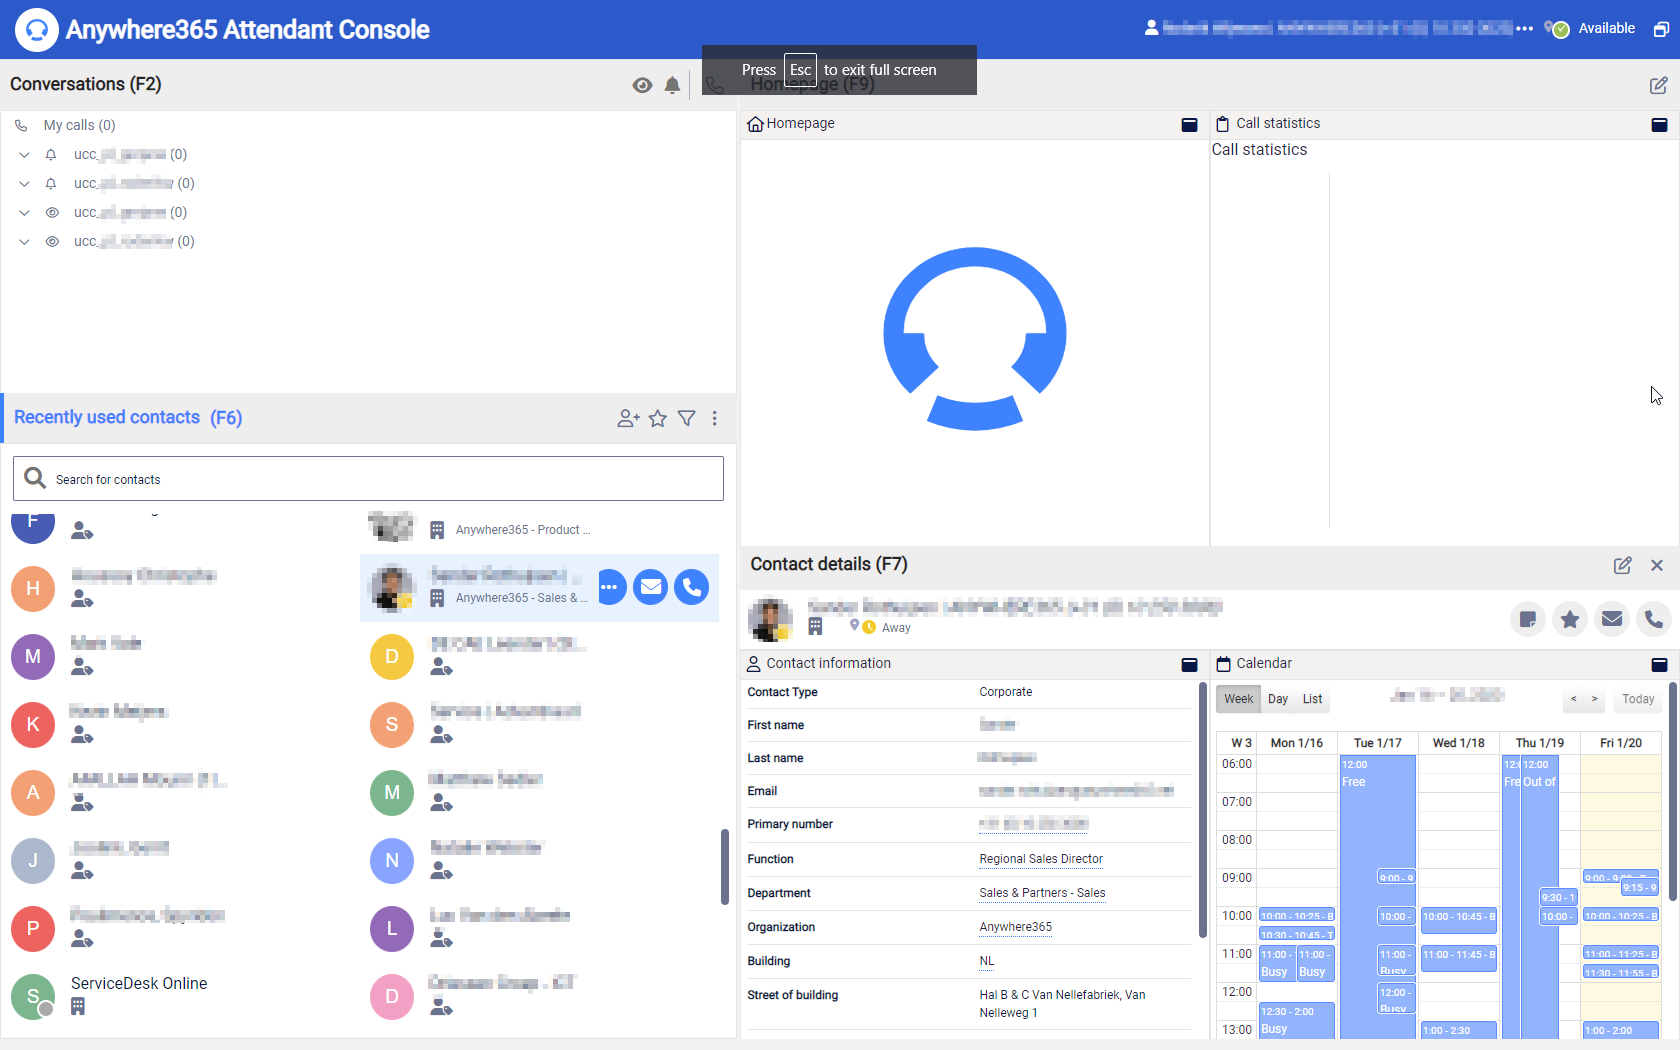
After a successful login, you should see the Attendant Console for Dialogue Cloud main screen:
Basic Initial Configuration of Attendant Console for Dialogue Cloud
To begin using Attendant Console for Dialogue Cloud, you will need to configure which UCC A Unified Contact Center, or UCC, is a queue of interactions (voice, email, IM, etc.) that are handled by Agents. Each UCC has its own settings, IVR menus and Agents. Agents can belong to one or several UCCs and can have multiple skills (competencies). A UCC can be visualized as a contact center “micro service”. Customers can utilize one UCC (e.g. a global helpdesk), a few UCC’s (e.g. for each department or regional office) or hundreds of UCC’s (e.g. for each bed at a hospital). They are interconnected and can all be managed from one central location. you want your queues and outbound calls to use.
To configure queues
- Click on the user name at the top-right of the Attendant Console window
- From the drop-down menu, select Preferences.
- Within the Preferences window, select the Queues tab.
- Make your selection in the Joined Queues and Monitored Queues sections and click Close. In a Joined queue, an operator/agent is part of the call distribution, whereas in a Monitored queue call information is displayed and allows for a call to be manually picked up.
- On the Queues tab, you can select queues (UCCs) to monitor:
To configure conversations
- Click on the user name at the top-right of the Attendant Console window
- From the drop-down menu, select Preferences.
- Within the Preferences window, select the Conversation tab.
- In the Calling Identity section, select the desired UCC/Caller ID for outbound calls [This will require you to have the DCIskill for the UCC] and click on Close.
Additional Configuration
You may want to specify and configure certain other settings such as Mail Servers, Mail Templates, User Access, etc. Please refer to Configuring Administrator Portal Settings in Attendant Console for Dialogue Cloud.